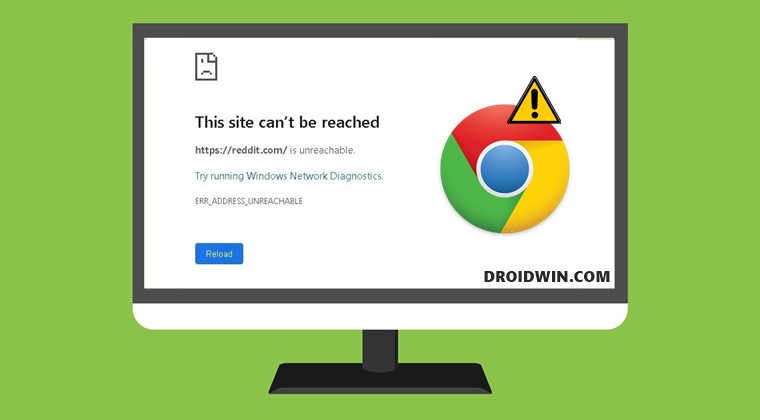
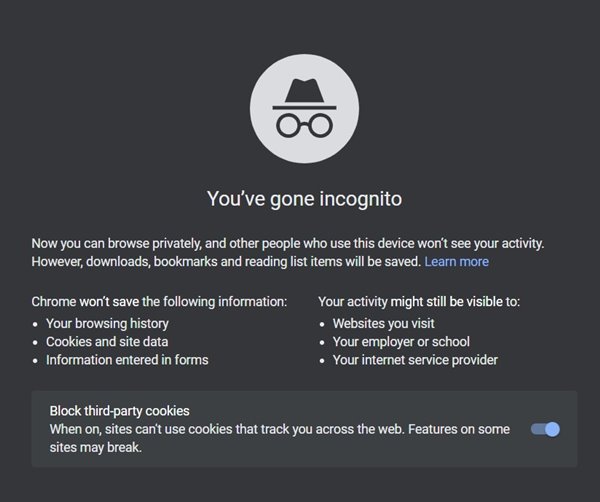
However, in spite of all the goodies involved, it isn’t free from its fair share of issues either. As of now, various users have voiced their concern that they are getting bugged with the ERR_ADDRESS_UNREACHABLE error in Google Chrome. This issue encompasses three different scales- only with a particular website, across all the sites accessed by a particular browser, and across all the sites accessed by any web browser. No matter which category your issue belongs to, this guide will make you aware of a few nifty workarounds to resolve all these issues. Follow along.
ERR_ADDRESS_UNREACHABLE Error in Chrome [10 Fixes]
It is recommended that you try out each of the below-mentioned workarounds and then see which one spells out success for you. So with that in mind, let’s get started.
FIX 1: Try Basic Workarounds
First and foremost, you should try out a few basic workarounds. In most cases, these are sufficient to rectify the underlying issues. So give the below-listed tweaks a try and then test out the results.
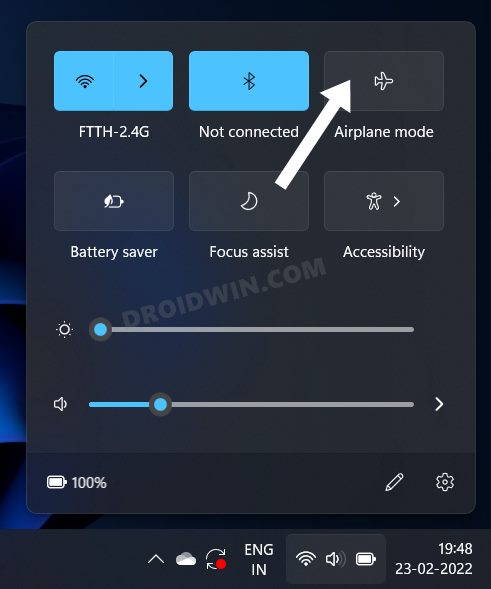
First off, verify that you have entered the correct website URL.Next up, refresh your device’s network. For that, enable the Airplane Mode on your PC from the Action Center, wait for a few seconds and then disable it.Likewise, restart your router. You may either do so remotely or unplug and replug the router into the socket.
FIX 2: Restart Chrome
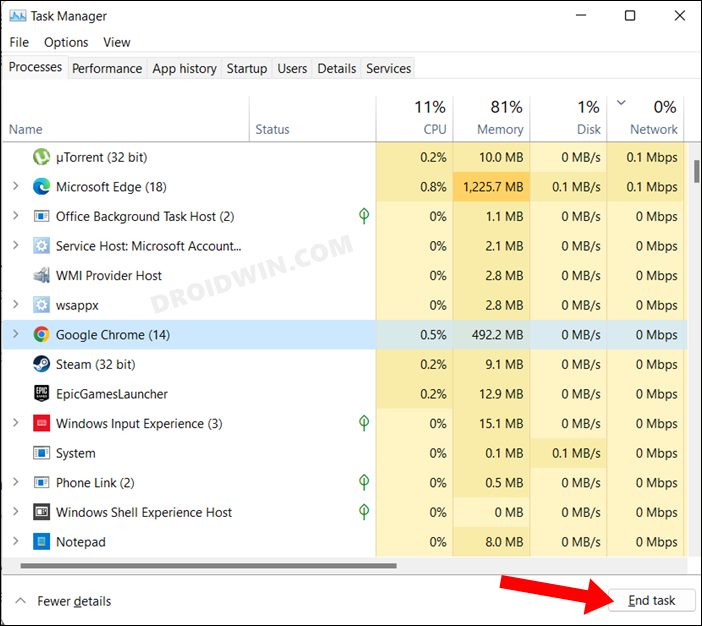
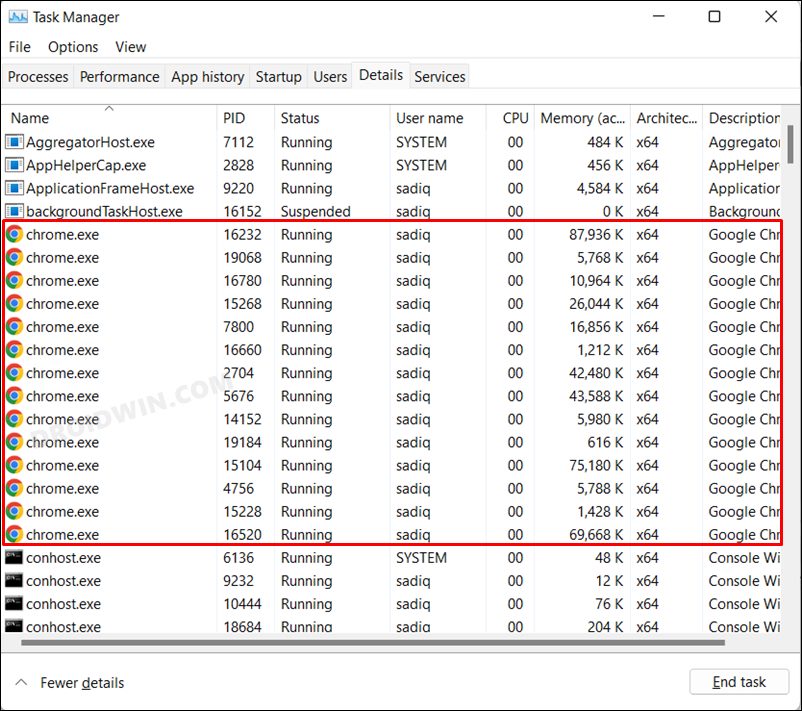
Next up, you should consider restarting the browser as well as all its underlying processes. this will give it a fresh instance to work upon which in turn might rectify the underlying issue as well.
FIX 3: Delete Chrome Cache
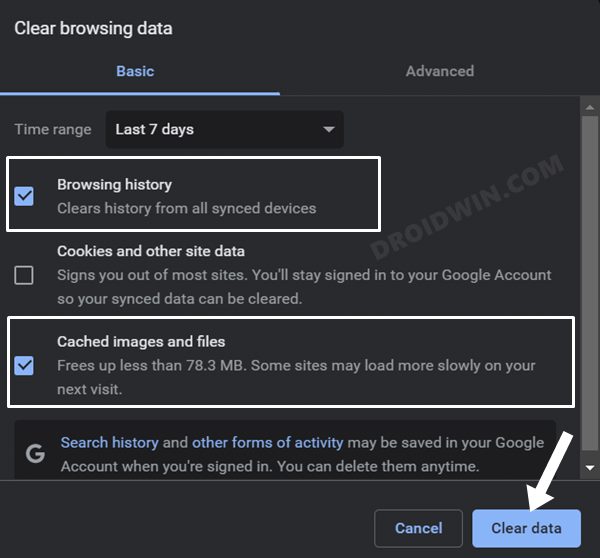
If a lot of temporary data gets accumulated over the due course of time, then not only will it slow down the browser, but it will also conflict with the proper functioning of the browser. Therefore, you should consider deleting these temporary data at regular intervals, and now could be just the right time for that. So refer to the below steps and implement this fix right away
FIX 4: Reset IP and DNS
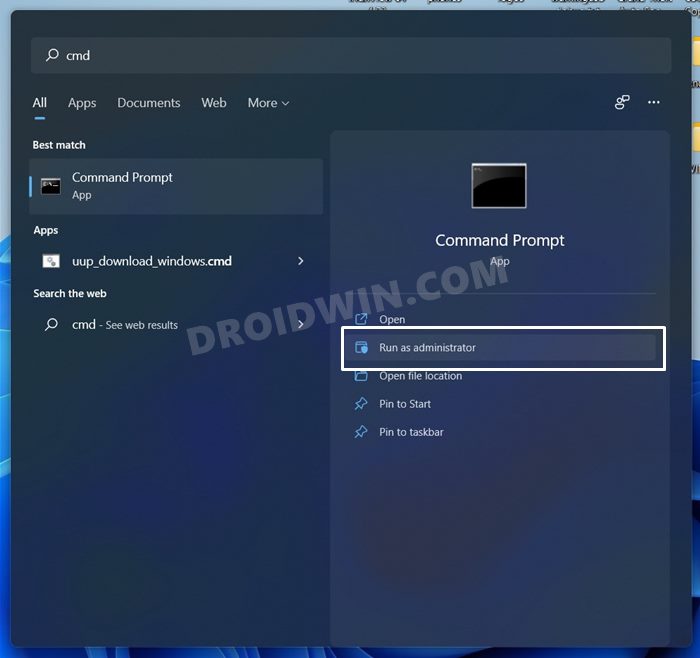
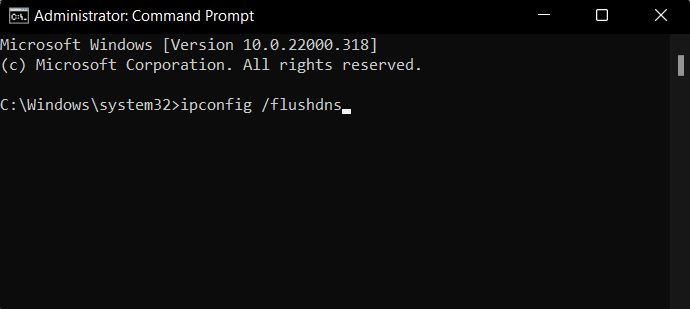
Your next course of action should be to flush the Internet Protocol and Domain Name Server data. After that, you should instruct your PC to renew/regenerate the new data and then put them to use. This usually comes in handy in case a lot of DNS cache has got accumulated over the due course of time or the said data gets corrupted. Are there any risks in deleting DNS? Well, not really. It’s just that you might notice a one-second delay when the website loads as the browser wouldn’t have any data to pick up from its phonebook (DNS Records). However, this delay is only for the first time as the DNS data will be repopulated once the site loads. So with that in mind, here’s how you could delete the DNS and IP data on your Windows 11 PC.
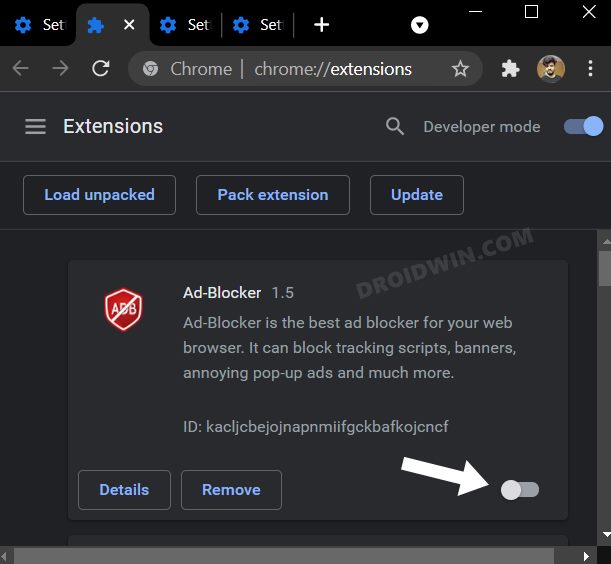
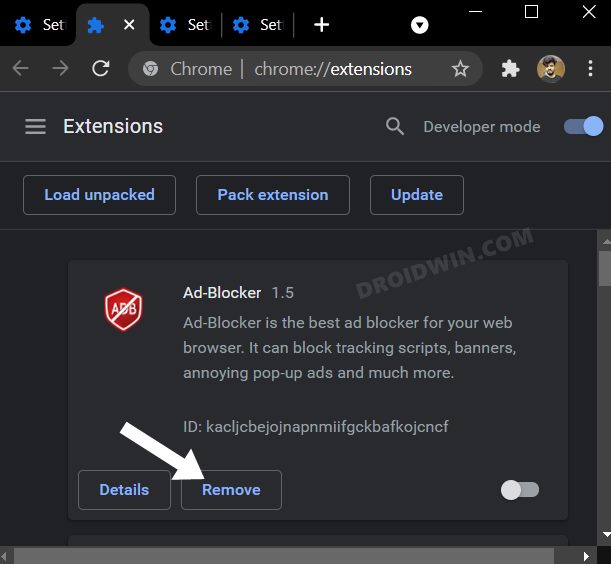
FIX 5: Disable Chrome Extensions
In some instances, a third-party extension might conflict with the normal functionality of the browser. As a result, the issues such as the one that we are currently dealing with are usually on the cards. So let’s verify if the add-ons are causing any troubles or not, and if they are indeed the culprit, then we will deal with them accordingly. Here’s how:
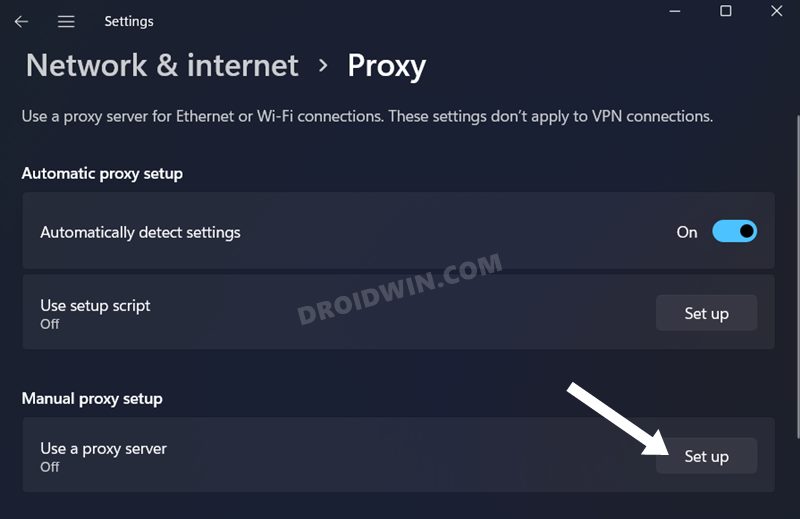
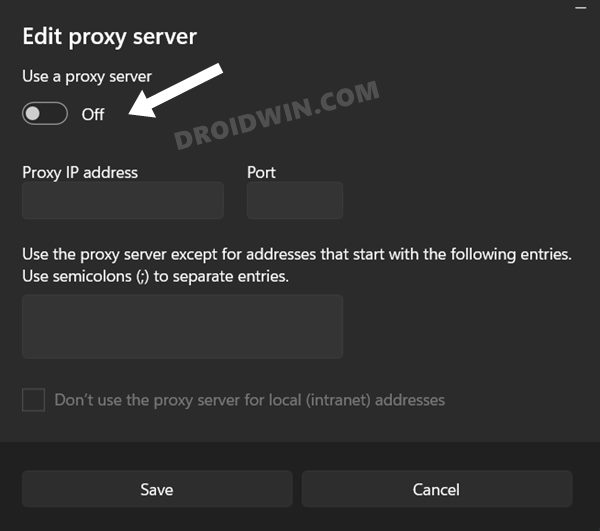
FIX 6: Disable Proxy
Apart from hiding your actual IP Address and giving you the ability to access geo-restricted contents, a proxy server also acts as a firewall and web filter. However, in some instances, the data packets might not be able to get past these many network layers and instead are lost midway during the exchange process. So to avoid that from happening, you should disable the proxy on your PC. Here’s how it could be done:
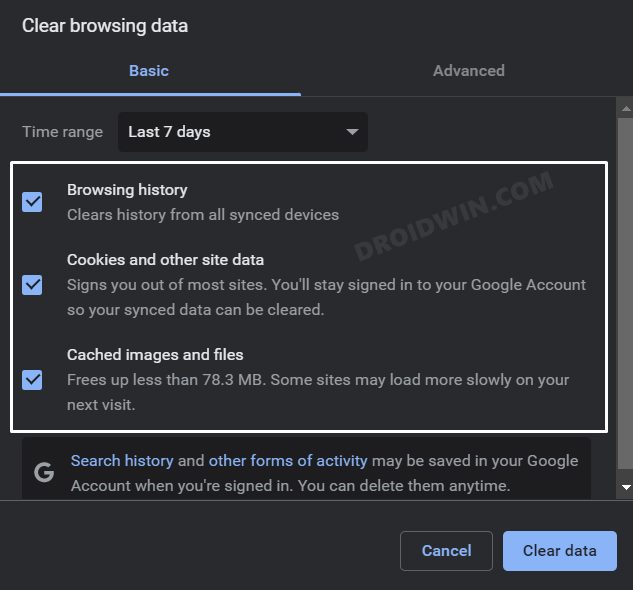
FIX 7: Delete Chrome Data
If deleting the temporary data didn’t work out, then it might be the case of the browse data being corrupted. Therefore, you should consider deleting this data and let Chrome repopulate the same from scratch. However, before trying it out, make sure to sync the data with your Google account [from the chrome://settings/syncSetup page].
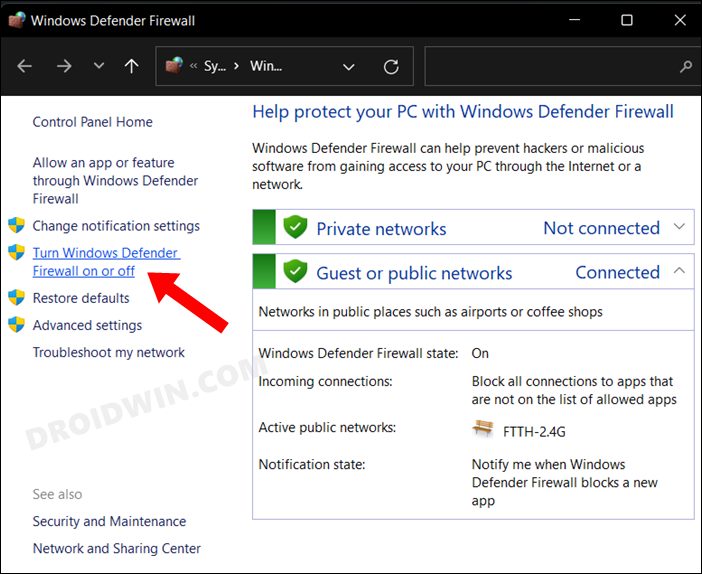
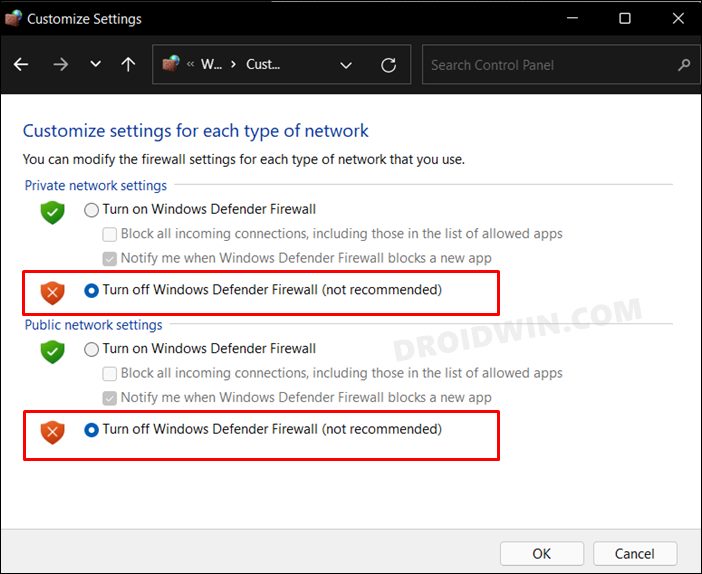
FIX 8: Disable Firewall
In some instances, the Windows Firewall might raise a false positive and flag a genuine data exchange process as a malicious one. This in turn will prevent the said app from accessing the internet on your PC. And this could well be the reason why Chrome is unable to load the website. However, if you are sure that the site that you are about to visit is trustworthy, then you could temporarily pause the firewall and then test out the results. [Or you could also add Chrome to the Firewall’s whitelist].
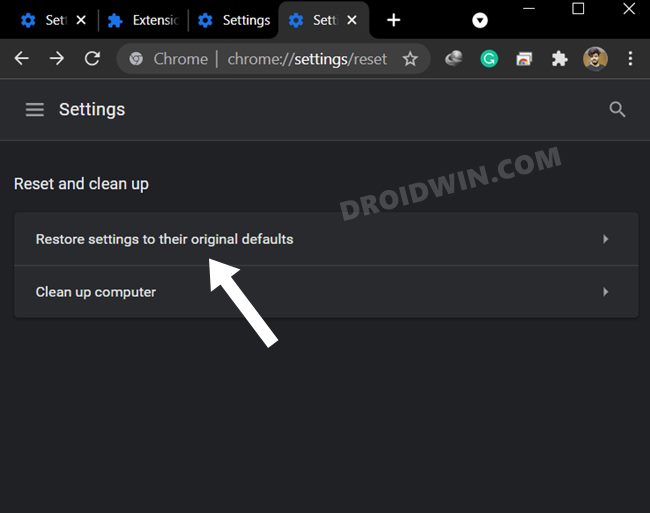
FIX 9: Reset Chrome
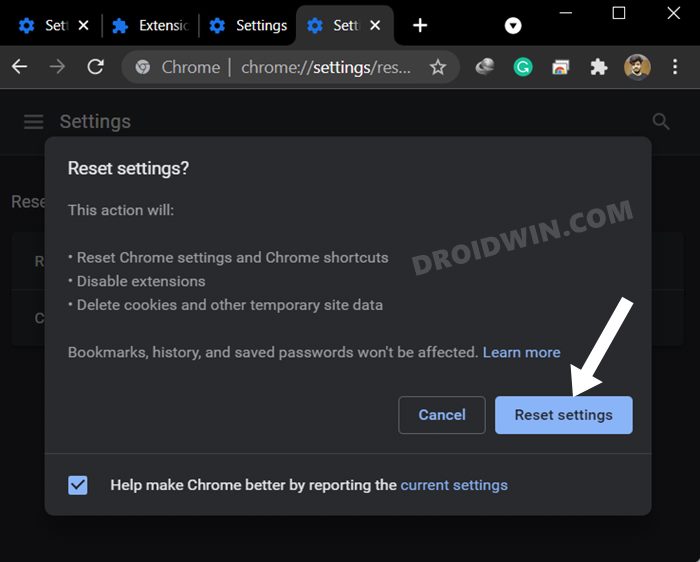
If none of the aforementioned methods managed to spell out success, then your next course of action should be to reset the browser to its factory default state. Doing so will remove all the customizations and tweaks, delete cache cookies and history, and disable all the extensions as well. So make sure to sync all the browser data with your Google account before proceeding with the below steps:
FIX 10: Reinstall Chrome
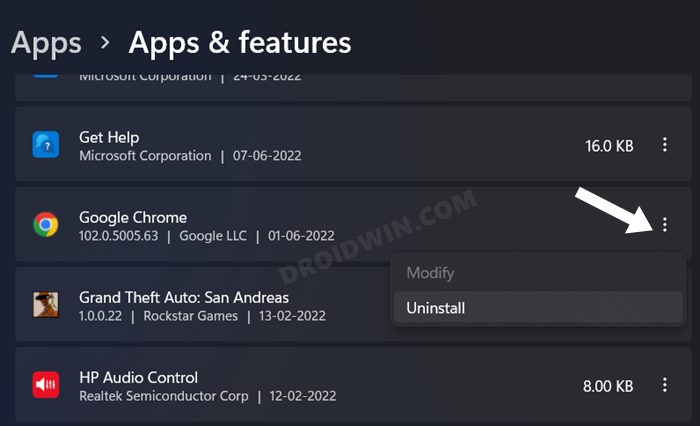
If the issue is still persisting, then the browser’s configuration settings might have got corrupted. Hence you will now have to take the nuclear route of uninstalling and then reinstalling the browser. Here’s how it could be done: That’s it. These were the ten different methods to fix the. Do let us know in the comments section which one worked out in your favor. Likewise, if you have any queries concerning the aforementioned steps, do let us know in the comments. We will get back to you with a solution at the earliest.
How to Downgrade Google Chrome on Windows 11Google Chrome Not Working in Windows 11: How to Fix [10 Methods]How to Change DNS Server Address in Windows 11How to Uninstall Google Chrome from Android [Without Root]
About Chief Editor
