In this regard, missing or corrupt DLL files are two issues that users get bugged with quite frequently. More often than not, its fix is relatively simple- just download the standalone DLL file from a trusted site and place it inside the System32 directory. However, Windows might not readily accept these DLL files since they are downloaded from third-party sites. To rectify this, you will have to register that DLL file via the regsvr32 command. However, it is proving to be easier said than done for many.
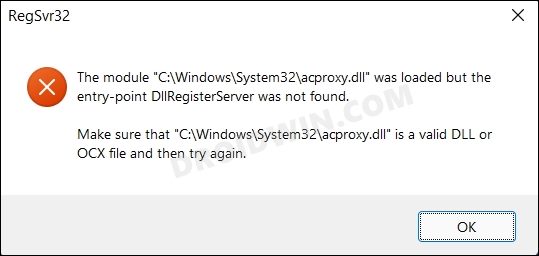
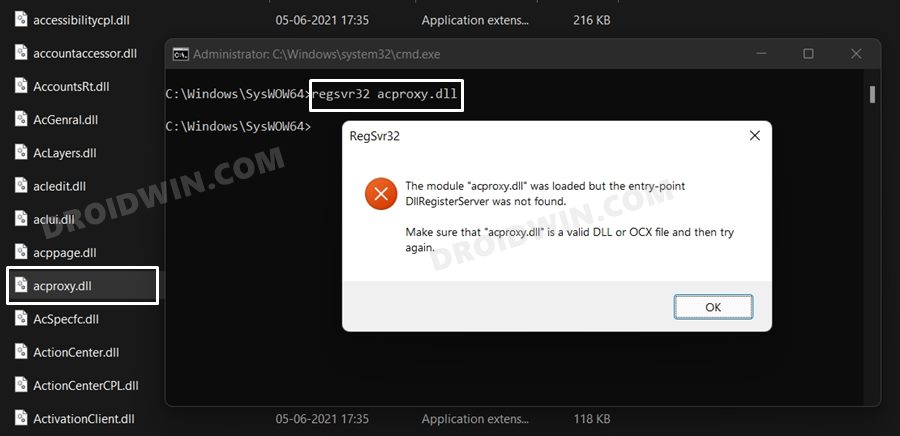
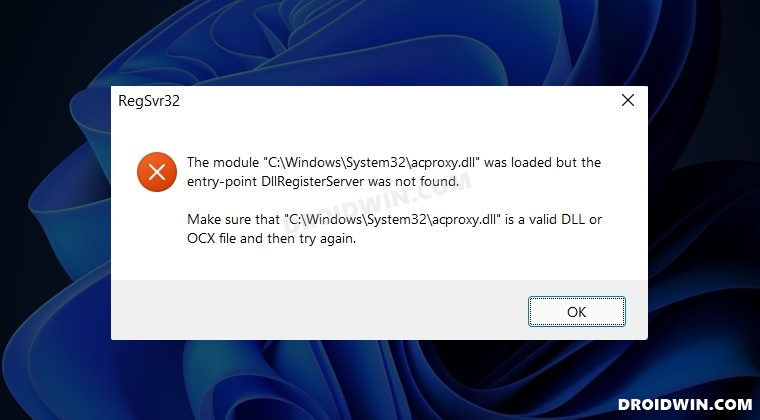
Various users have voiced their concern that they are getting the following error message while trying to register their DLL file (X is the location of that DLL file): “The module X was loaded but the entry-point DLLRegisterServer was not found. Make sure that X is a valid DLL or OCX File and then try again”. If you are also getting bugged with this issue, then this guide will make you aware of various methods to fix this DLLRegisterServer was not found error on your Windows 11 PC.
Fix DLLRegisterServer was not found on Windows 11
Do note that there’s no universal fix as such. You will have to try out each of the below-mentioned workarounds and see which one works best in your favor. So with that in mind, let’s get started.
FIX 1: Use Command Prompt as an Admin
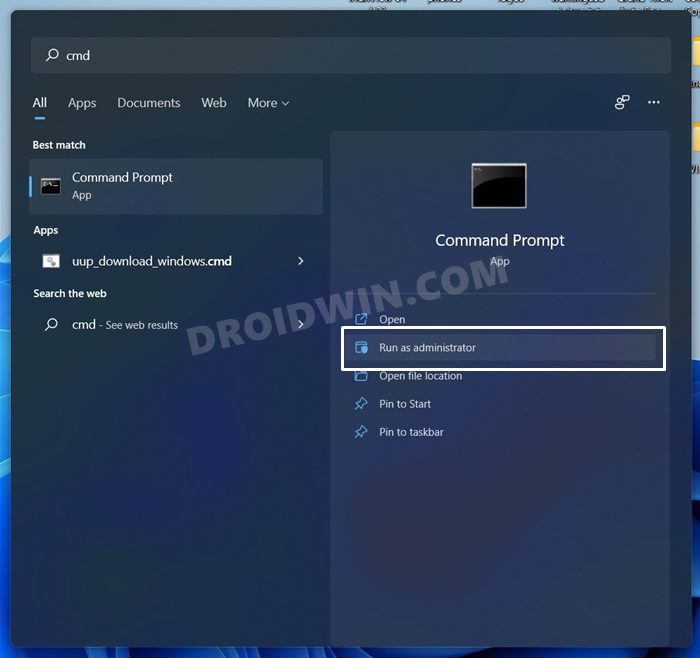
First and foremost, make sure to use the register DLL command inside the CMD window with administrative privileges. To do so, there are two different approaches that you could take:
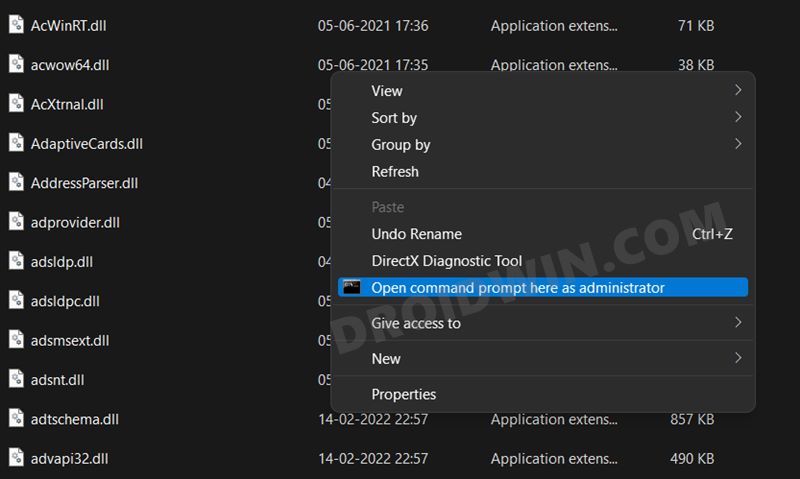
Open CMD as admin from the Start menu. Then use the change directory (cd) command to change its location where the DLL file is present. Preferably, the DLL file should be present in the C:\Windows\System32\ directory. Add ‘Open as CMD’ in right-click menu using this Registry Trick. Then right-click in an empty location inside the directory where the DLL file is present. After that, select Show More Options > Open Command Prompt Window Here as an administrator.
FIX 2: Use SysWow64 Directory
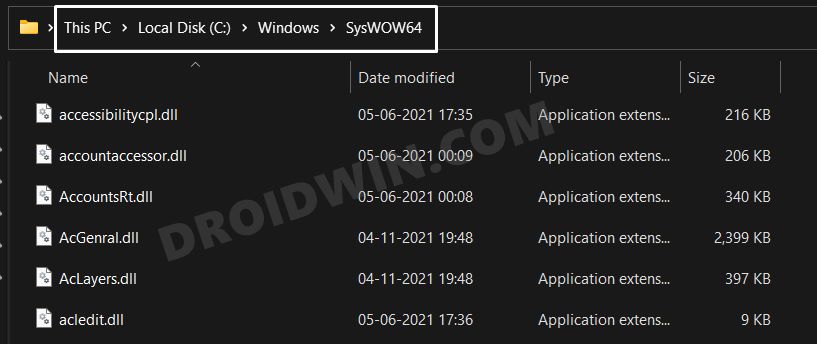
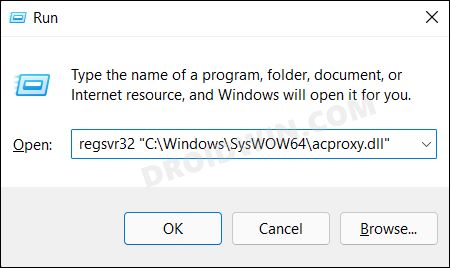
The default DLL location is System32, however, Windows also stores some DLL files in the SysWow64 directory. Therefore, copy the desired DLL file and then paste it into the C:\Windows\SysWOW64\ location. Now try registering the file again and check if it fixes the DLLRegisterServer was not found error on your Windows 11 PC.
FIX 3: Use Run
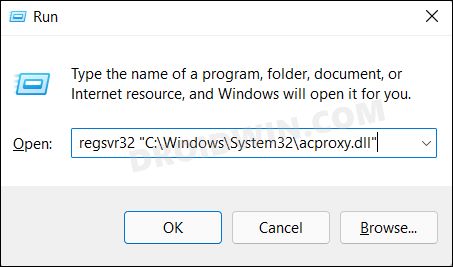
Instead of CMD, you could also use the Run dialog box for registering the DLL file. Here’s how it could be done, taking acproxy.dll as an example (make sure to replace the file name accordingly):
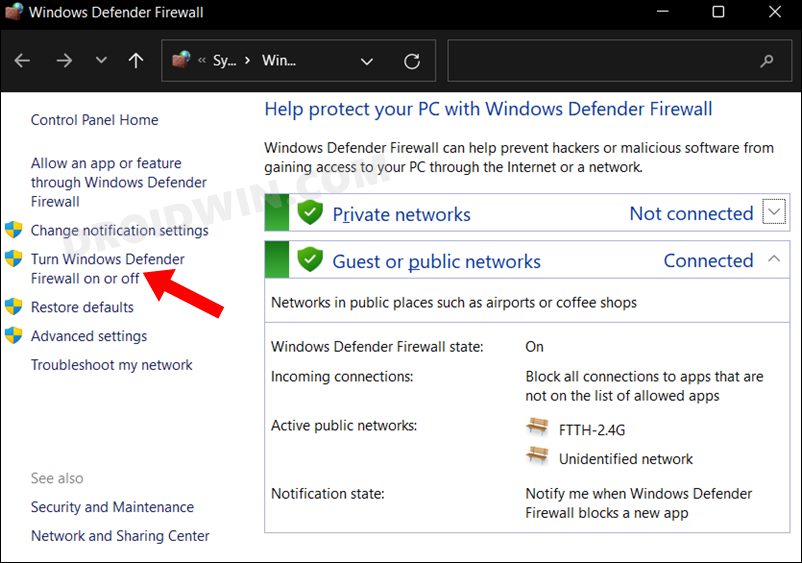
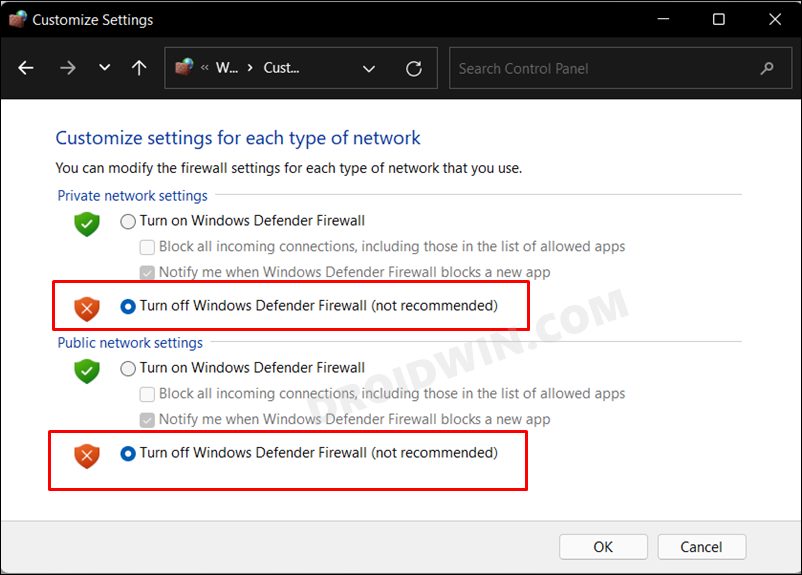
FIX 4: Disable Windows Firewall
Since you have downloaded the DLL file from a third-party site, Windows Defender might block its functionality on your PC. So if you are sure of the file’s trustworthiness, then you could temporarily disable Firewall and then let the file carry out the required task. After that, you may then re-enable it. Here’s how:
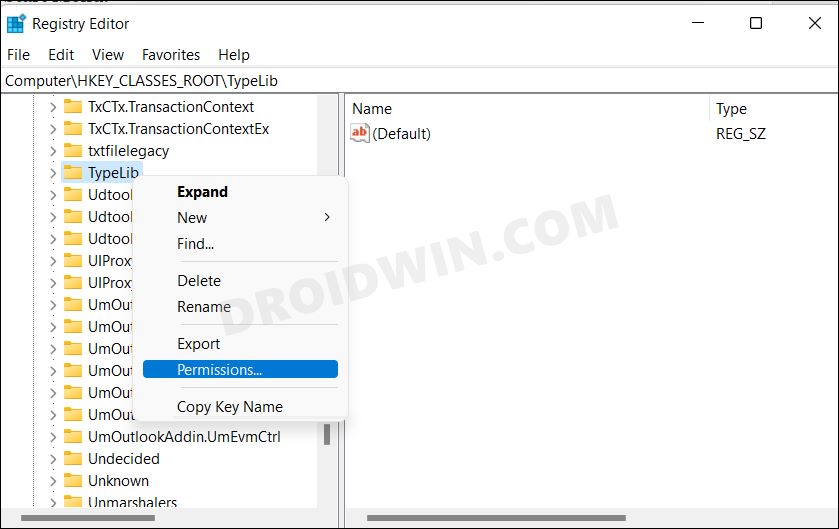
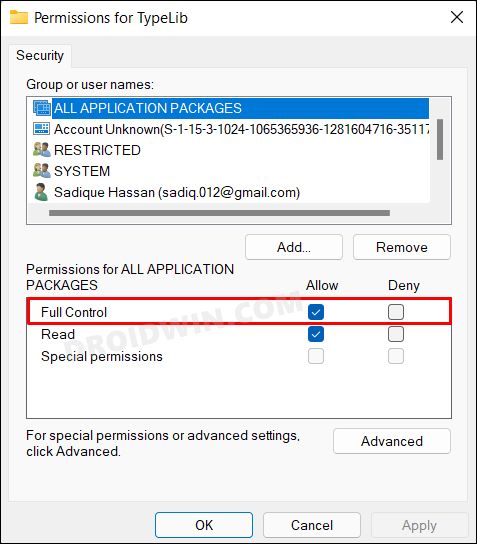
FIX 5: Give Account Permissions to TypeLib
The issue that we are currently dealing with could also arise due to the inability of the DLL to get the required permissions. In this regard, the TypeLib registry file stores information about all the libraries on your PC. Therefore, you should consider giving it the highest level of privileges and let it function in an unrestricted environment. Here’s how it could be done: So with this, we round off the guide on how you could fix the DLLRegisterServer was not found error on your Windows 11 PC. We have listed five different methods for the same. Do let us know in the comments which one spelled out success for you. Likewise, all your queries are welcomed in the comments section below.
Block IP Address via Windows Defender Firewall in Windows 11Remove Update and Shutdown Option from Windows 11 Power MenuChange Windows 11 Notification Display Duration [3 Methods]Remove Arrow from Shortcut File Icons in Windows 11
About Chief Editor
